
Sometimes a room doesn't need another new piece of furniture. Sometimes the piece you already own just needs a second chance.
That was the case with our living room bench. I wanted it to feel lighter without replacing something that was still perfectly useful. I kept the existing white frame and gave only the dark seat a white base coat followed by a softer faux-wood finish. The whole project happened right there in the living room.
And because this is The Ivey House, there was a little experimenting, a little reusing what I already had, and a sweatshirt doing a job it probably wasn't designed for.
The before and after
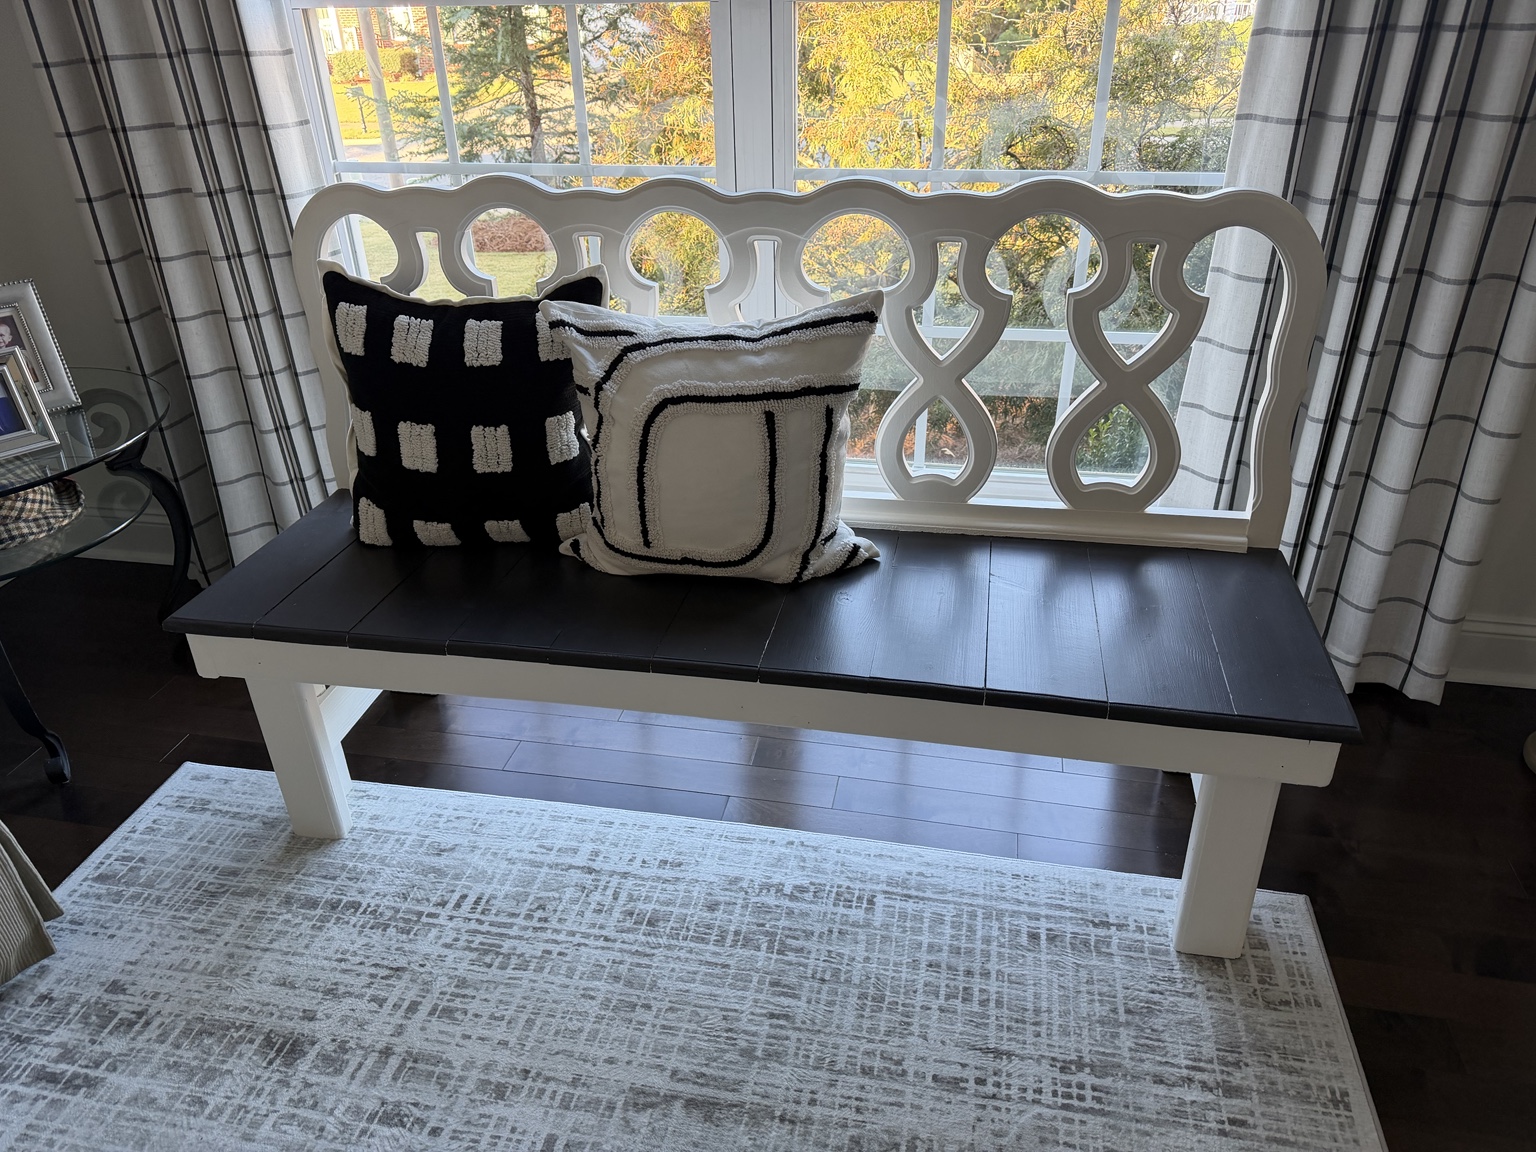
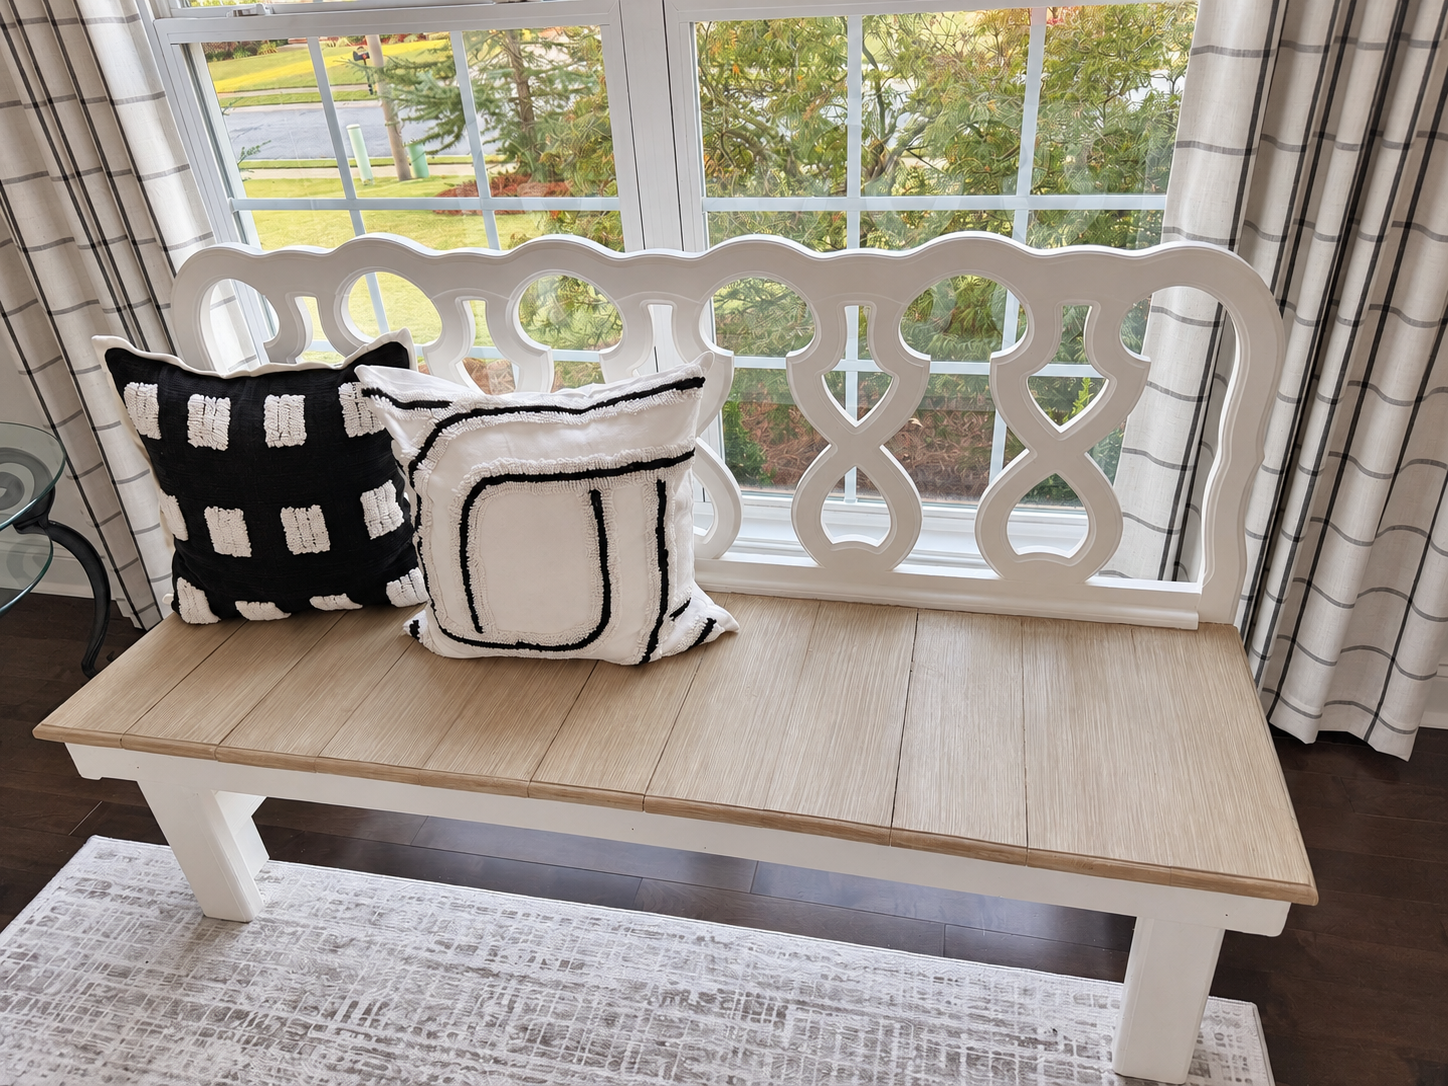
The lighter seat makes the window area feel more open. Its warm beige-oak appearance adds a gentle contrast to the white frame and works with the rug and curtains. I really like how much this one change brightened the room.
What I used
Product and supply links are listed below, along with sources for the bench pillows.
The bench I already owned, plus leftover finish from my credenza project.
Sherwin-Williams ProClassic Interior Acrylic Latex in Satin Extra White for the seat base.
Crafter’s Collection White Acrylic Craft Paint to lighten the glaze mixture.
A 2½-inch paintbrush to apply the base paint and glaze, a 5-inch brush to create the faux grain, and a small flat brush for the seat edge.
Painter’s tape, measuring tools, and a washed fabric shower curtain as a drop cloth.
The faux wood mixture
I started with approximately 8 fluid ounces of leftover credenza mixture and added about ¼ cup (2 fluid ounces) of Crafter’s Collection White Acrylic Craft Paint. That is roughly 4 parts existing mixture to 1 part additional white paint by volume, making about 10 fluid ounces total.
The original credenza mixture contained 2 parts Retique It Wood’n Stain in Pickled Oak, 1 part Rust-Oleum Chalked Aged Glaze, and 1 part Dixie Belle Van Dyke Brown Glaze. The white base coat is separate from that mixture.
Adding the white craft paint softened and lightened the finish. These are approximate quantities from a leftover batch. Test the complete combination on your own base coat before committing to a furniture piece.
How I transformed the bench
1 Protect the room and tape the edges
I painted the bench in place in the living room, with a washed fabric shower curtain underneath. When I replace a fabric shower curtain, I wash the old one and save it for projects. It gets another useful life as a drop cloth.
I taped off the white frame around the seat. If the existing paint line is irregular, I place the tape evenly ABOVE that line instead of following every wobble. That gives me a straight boundary for the new finish, and I can come back for touch-ups if needed.
2 The very professional prep
In full transparency, I brushed the dust off with my sweatshirt sleeve. No sanding. Nothing but professionalism here.
That is what I did on this bench. For your project, clean the surface and follow the paint manufacturer’s preparation directions for the existing finish. A sweatshirt sleeve is not my official surface-prep recommendation.
3 Paint the seat white
Using a 2½-inch paintbrush, I applied two coats of Sherwin-Williams ProClassic Interior Acrylic Latex in Satin Extra White to the seat. I waited about an hour between coats, then gave the second coat about another hour to dry before applying the glaze mixture.
Those were my approximate intervals on this project. Follow the product’s drying and recoating directions for your conditions; dry to the touch does not mean fully cured.
4 Apply the faux finish
I applied one coat of the lightened faux-wood mixture with the 2½-inch brush, then used the 5-inch brush to create the faux grain, working in the direction of each board’s grain. I used the small flat brush from the chalk and wax brush set for the faux finish around the seat’s edge. The existing plank seams helped define the individual boards.
The layers along the way
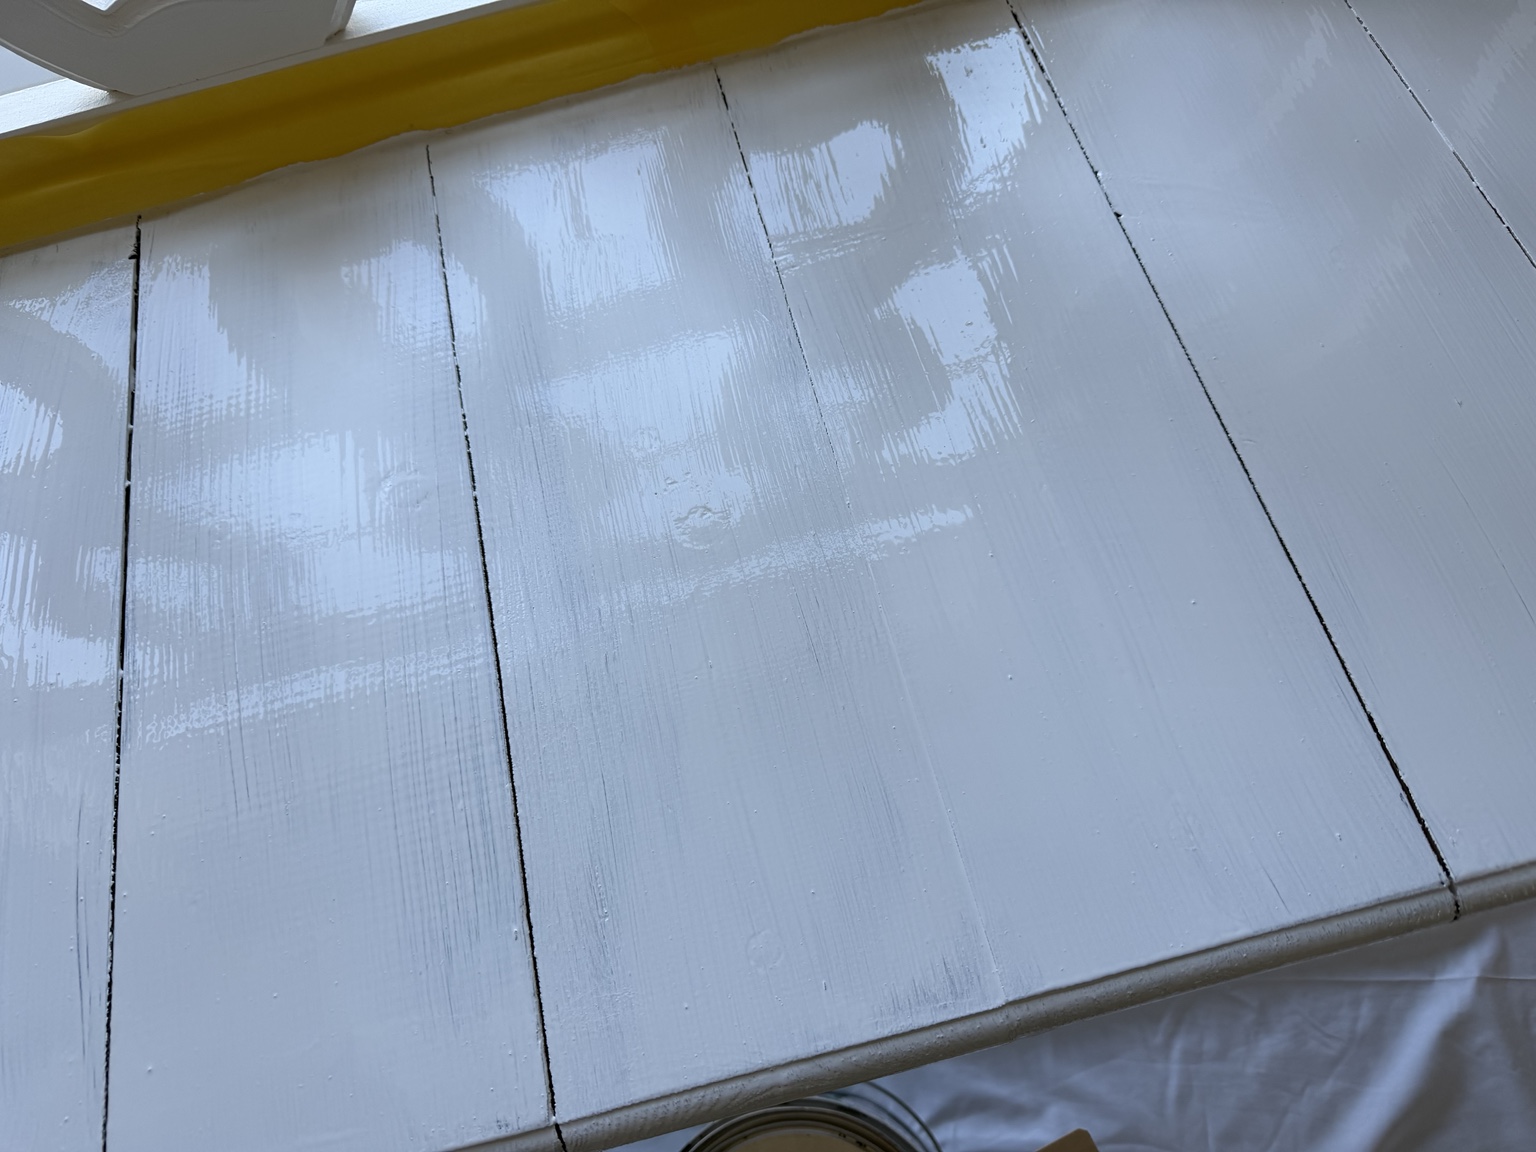
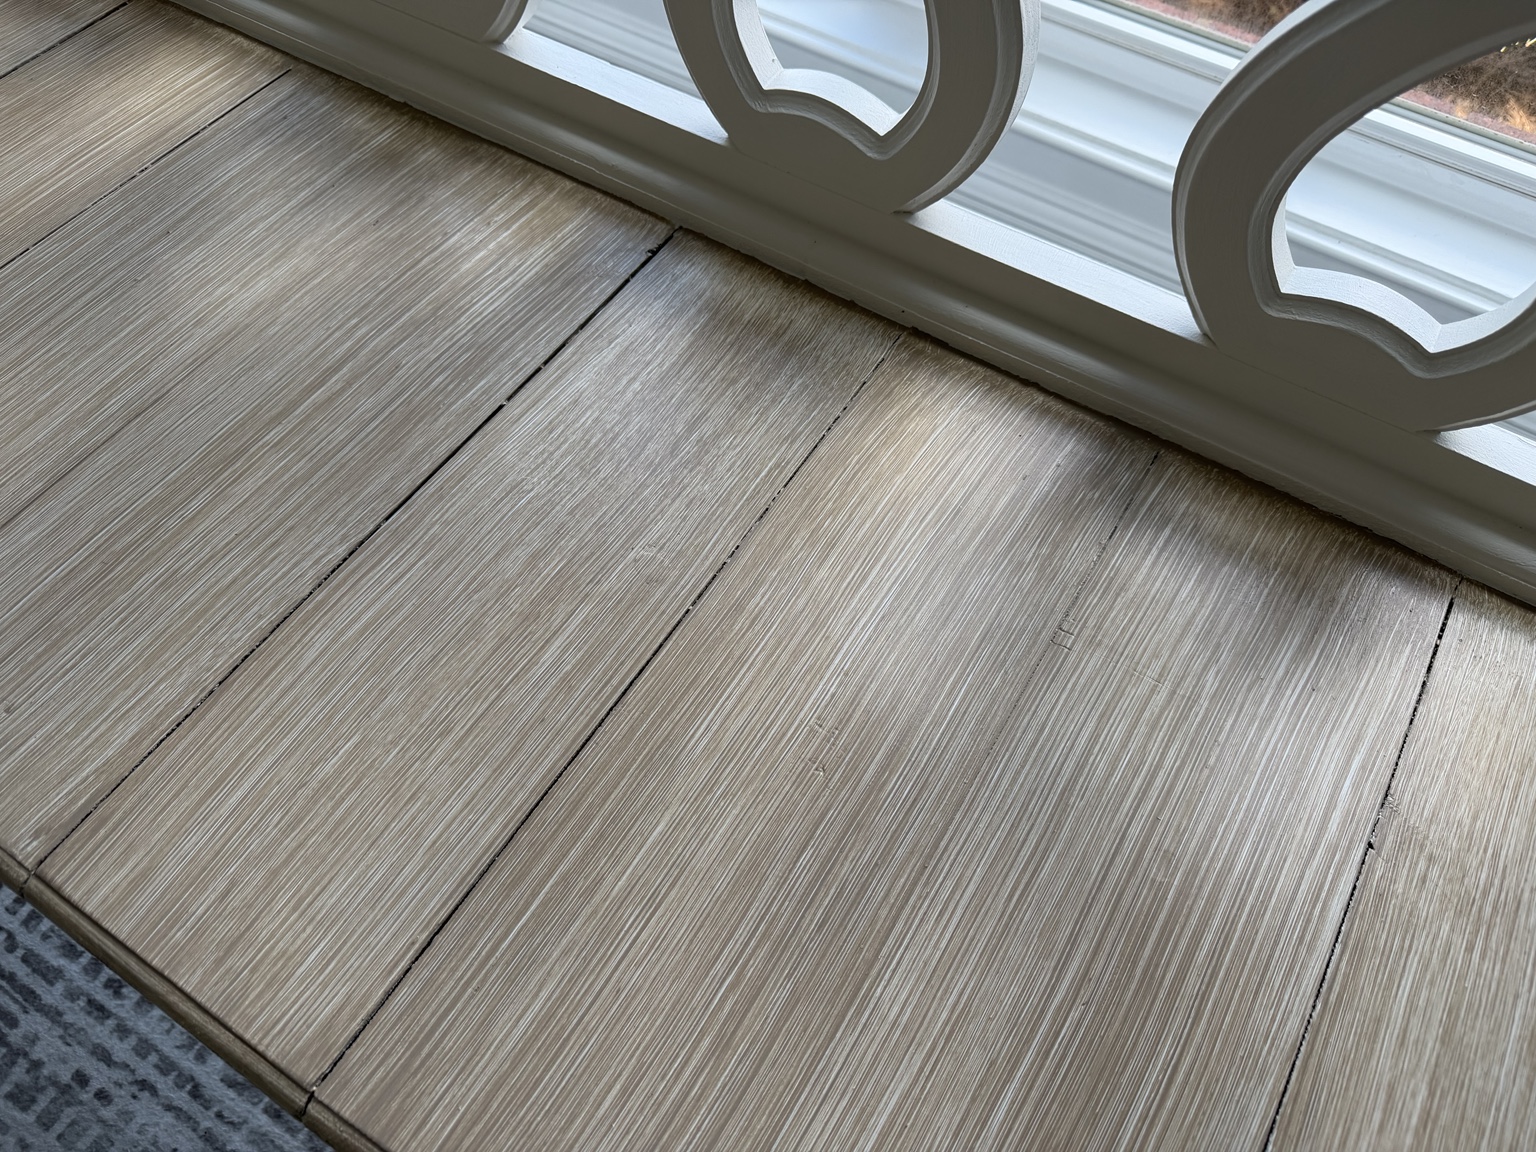
A base coat does not always need perfectly opaque coverage when you are layering a faux finish over it. On this bench, some variation underneath contributed to the final look. That depends on the finish you want, which is why testing the whole combination matters.
The topcoat question
I have not applied a protective topcoat. I may add one later, after I finish a few more projects. The photos show the finish as it is now, without a topcoat.
What I would tell a friend
Test, test, test. Match your sample’s base color and sheen to the project, use the same application tools and technique, and let it dry before deciding. A finish can look different across a whole piece of furniture than it does on a small sample.
Use what you have when it makes sense. This project reused the bench, leftover glaze mixture, and an old shower curtain. A different finish was enough to give the piece a new place in the room.
And give yourself some grace. This bench had imperfect paint lines for years, and I thought of them as part of its charm. It is funny how we accept those details in someone else’s work, then inspect our own from six inches away. Do the work well, but take a step back before deciding every little thing needs fixing.
The finished look
The best part was seeing how much lighter the room felt with the same bench in the same spot. I changed the seat, and it changed how the whole piece felt in the room.
Beautiful homes evolve—one thoughtful project at a time.
Product and supply links
These are the product references for this project. The brushes are linked as sets where applicable; you do not need every brush in each set. The original white frame was not repainted.
White base paint — Sherwin-Williams ProClassic
White craft paint — Crafter’s Collection, White, 8 fl oz
Pickled Oak — Retique It Wood’n Stain
Aged Glaze — Rust-Oleum Chalked
Van Dyke Brown Glaze — Dixie Belle
5-inch faux-finish brush — Magimate
Paintbrush set — Pro Grade, 5-piece
Small flat edge brush — from the 4-piece chalk and wax brush set
Measuring cups and spoons — DJXRQY, 10-piece set
Painter’s tape and the repurposed shower curtain were also used. No specific tape product is linked.
Bench styling sources
sykting black-and-white embroidered pillow covers — 20 × 20 inches, set of 2
Black-and-white tufted chenille pillow cover — 18 × 18 inches
The budget
I reused the bench and supplies I already had, including the leftover credenza mixture. Reusing supplies still has a material cost, so I am not calling this a zero-dollar makeover. I have not calculated the cost of the amounts consumed or a total project cost.
— The Ivey House